Many homeowners underestimate how quickly mold can develop after flooding, often within 24 to 48 hours. To ensure proper Mold Prevention, it’s crucial to take immediate action in water removal and drying. Understanding the best practices for managing moisture and cleaning affected areas is critical. What you do next could determine your home’s health and safety in the long run. Let’s explore the most effective techniques for mold prevention post-flooding.
Key Takeaways
- Remove standing water quickly and thoroughly to minimize moisture levels and prevent mold growth.
- Ensure proper ventilation by opening windows and using fans to promote airflow and decrease humidity.
- Use dehumidifiers to effectively lower humidity levels and accelerate the drying process in affected areas.
- Inspect and replace wet insulation and porous materials to eliminate potential breeding grounds for mold.
- Seal potential mold entry points, such as cracks in foundations and gaps around windows, to prevent moisture ingress.
Why Mold Prevention Is Vital After Flooding
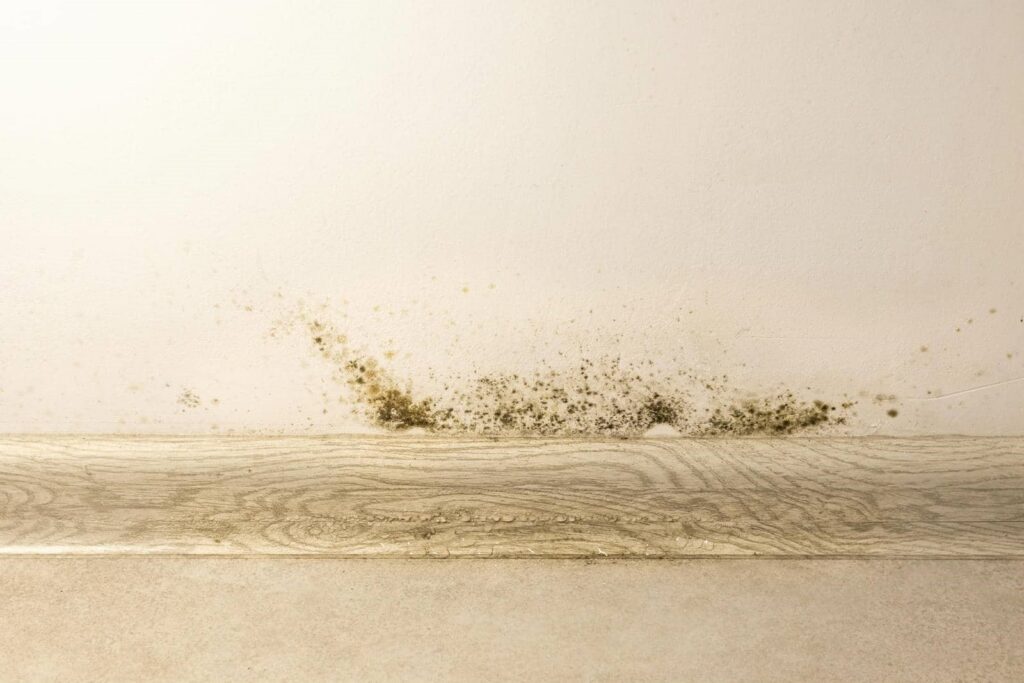
When you experience flooding, addressing mold prevention becomes vital because mold can begin to grow within 24 to 48 hours in damp conditions. The health risks associated with mold are significant, ranging from respiratory issues to allergic reactions, making it imperative for you to act swiftly.
Flood risks amplify these concerns, as the excess moisture creates an ideal breeding ground for mold spores. By taking proactive measures, you can protect your living environment and ensure the well-being of those around you.
Focus on drying out affected areas, removing contaminated materials, and maintaining proper ventilation. These steps mitigate mold growth and foster a safer, healthier space that promotes a sense of belonging and comfort for you and your loved ones.
Immediate Steps for Water Removal
Before you start removing water, it’s essential to assess the extent of the damage.
This evaluation helps you determine the best methods for extraction, whether using pumps or vacuums. Acting quickly will minimize water exposure and reduce the risk of mold growth.
Assess Water Damage First
As you begin to tackle the aftermath of flooding, it’s vital to assess the extent of the water damage immediately.
Start with a thorough water damage assessment, identifying affected areas such as walls, floors, and belongings. Document everything, taking photos for insurance purposes.
Next, conduct a structural integrity evaluation to determine if your home’s foundation and framework are compromised. Pay close attention to signs of warping or sagging, as these could indicate severe issues.
This step is important for ensuring safety and preventing further complications, including mold growth.
Use Pumps and Vacuums
Act quickly to remove standing water, as this is essential in preventing mold growth after flooding.
Using sump pumps for larger areas can efficiently drain water, especially when dealing with significant flooding. These pumps can remove substantial amounts of water quickly, reducing the time your space remains damp.
For smaller, more contained areas, wet vacuums are your best bet. They can effectively suck up remaining water, ensuring that moisture levels drop to a manageable level.
Remember, the faster you act, the less likely mold will take hold. Combine these tools with thorough drying methods, and you’ll create an environment that’s much less inviting for mold.
Prioritize water removal, and you’ll foster a healthier living space for everyone.
How to Spot Water Damage?
To spot water damage, you should first look for visible water stains on walls and ceilings, which often indicate previous leaks or flooding.
Additionally, pay attention to any musty odors, as these can signal mold growth stemming from hidden moisture.
Identifying these signs early can help you address potential problems before they worsen.
Visible Water Stains
Identifying visible water stains is essential in evaluating potential water damage after a flooding event. Effective visible water detection can help you prevent mold growth and protect your home.
Here are key indicators for water stain identification:
- Color Changes: Look for discoloration on walls or ceilings, often yellow, brown, or black.
- Texture Alterations: Notice any bubbling or peeling paint, which signals underlying moisture issues.
- Location: Pay attention to stains near windows, doors, or plumbing fixtures, as these are common leak sources.
- Size and Shape: Large, irregular stains may indicate a more significant problem requiring immediate action.
Musty Odor Detection
After evaluating visible water stains, the next step in spotting water damage involves detecting musty odors.
Musty odors often indicate hidden moisture, with common musty odor sources including damp carpets, walls, and insulation. Pay close attention to areas near leaks, basements, and behind appliances.
If you notice these odors, it’s essential to act quickly. Utilize effective odor removal techniques such as thorough cleaning, using dehumidifiers, and ensuring proper ventilation to mitigate mold growth.
Additionally, consider using air purifiers equipped with HEPA filters to enhance air quality.
Identifying and addressing musty odors helps prevent mold and fosters a healthier living environment, allowing you to feel more comfortable and secure in your home.
Best Practices for Drying Your Home
Once floodwaters recede, promptly drying your home becomes essential to preventing mold growth.
To effectively manage moisture control and promote home ventilation, follow these best practices:
- Remove standing water: Use pumps or buckets to eliminate any remaining water quickly.
- Ventilate your space: Open windows and doors to encourage airflow, helping to dry out your home faster.
- Use dehumidifiers: Invest in dehumidifiers to lower humidity levels and accelerate drying.
- Check insulation: Inspect and replace wet insulation, as it can harbor moisture and mold.
How to Clean and Disinfect Affected Areas
Cleaning and disinfecting affected areas is essential to preventing mold growth after flooding. Start by removing any standing water and debris.
For surfaces, utilize effective mold cleaning techniques like scrubbing with a mixture of water and detergent. After cleaning, choose appropriate disinfectant options, such as solutions containing bleach or hydrogen peroxide, to kill any remaining mold spores. Ensure you follow the manufacturer’s instructions for dilution and application.
Pay special attention to porous materials—if they’re heavily contaminated, it’s best to discard them. Finally, allow the cleaned areas to dry completely to inhibit mold regrowth.
Why You Should Use Dehumidifiers
Even with thorough cleaning and disinfection, moisture remains a significant concern after flooding. Using a dehumidifier can be essential in preventing mold growth and ensuring a safe environment.
Here are some key dehumidifier benefits:
- Reduces Humidity: It lowers indoor humidity levels, making it harder for mold to thrive.
- Speeds Up Drying: Helps expedite the drying process of affected areas, reducing damage.
- Improves Air Quality: By removing excess moisture, it enhances overall air quality.
- Prevents Damage: Protects your home and belongings from moisture-related deterioration.
Different dehumidifier types cater to various needs, ensuring you find the right one for your situation.
Prioritizing this step fosters a stronger, healthier living space for you and your loved ones.
Choose Mold-Resistant Materials for Repairs
When repairing your home after flooding, selecting mold-resistant materials is essential for long-term protection.
Opt for mold-resistant drywall, waterproof paint, and durable flooring options to create a barrier against moisture.
These choices enhance your home’s resilience and minimize the risk of future mold growth.
Selecting Mold-Resistant Drywall
Choosing the right drywall after flooding is essential for preventing mold growth in your home.
Opting for mold-resistant options safeguards your health and enhances your living environment.
Here are some installation tips to take into account:
- Select Type X drywall: It’s fire-resistant and offers added durability.
- Use moisture-resistant drywall: Ideal for high-humidity areas, it greatly reduces mold risk.
- Ensure proper sealing: Seal joints and edges with mold-resistant tape and compound.
- Ventilate the space: Good airflow during and after installation helps moisture evaporate.
Using Waterproof Paint Options
After installing mold-resistant drywall, the next step in safeguarding your home from mold growth involves selecting the right paint.
Opt for waterproof coatings specifically designed to prevent moisture penetration, which is essential in post-flood scenarios. These coatings create a barrier, effectively inhibiting mold spores from establishing a foothold.
When applying the paint, make sure you follow the manufacturer’s guidelines for ideal results; proper paint application is key to achieving a long-lasting defense against mold.
Additionally, consider using a primer designed for damp environments to enhance adhesion and durability.
Choosing Durable Flooring Materials
While you may be keen to restore your home after flooding, selecting the right flooring materials is essential for preventing mold growth.
Here are some options to weigh:
- Luxury vinyl: This material isn’t only waterproof but also easy to clean, ensuring long-term durability.
- Bamboo flooring: Naturally resistant to moisture, bamboo offers a sustainable choice that adds warmth to your space.
- Tile: With its non-porous surface, tile can withstand water exposure and is simple to maintain.
- Cork: As a natural insulator, cork resists mold and mildew while providing comfort underfoot.
Seal Potential Mold Entry Points
To effectively combat mold growth after flooding, it’s essential to seal potential entry points around your home.
Start by inspecting your foundation, windows, and doors for cracks or gaps. Use caulk to fill these openings, preventing moisture from seeping in, which is a primary catalyst for mold growth.
Don’t forget to check ventilation ducts, as these can harbor humidity and facilitate mold spread. Confirm that plumbing and electrical lines are properly sealed, too, as they can serve as unnoticed entry points.
By taking these proactive measures, you’ll create a barrier against mold, fostering a healthier living environment for you and your loved ones.
Signs of Mold Growth to Monitor?
How can you quickly identify mold growth in your home? Monitoring for specific mold indicators is essential for effective growth prevention.
Here are some signs you should keep an eye on:
- Visible Mold: Look for any black, green, or white patches on walls, ceilings, or floors.
- Musty Odor: A persistent, earthy smell often signals hidden mold.
- Water Damage: Stains or discoloration from previous flooding can indicate moisture issues that promote mold.
- Health Symptoms: Unexplained respiratory issues or allergies in your household may correlate with mold presence.
Being aware of these signs helps you take proactive steps in maintaining a healthy living environment.
Don’t hesitate to act if you notice any of these indicators; your home deserves the best care.
When to Contact Mold Remediation Professionals
When should you consider reaching out to mold remediation professionals? If you notice any signs of mold growth after flooding, like persistent musty odors or visible mold, it’s essential to act quickly.
A thorough mold assessment by experts can identify hidden mold and evaluate the extent of damage. If you’ve already attempted DIY methods without success, it’s time to seek professional services.
Additionally, if anyone in your household has respiratory issues or allergies, don’t hesitate to contact professionals for a safe and effective solution.
Frequently Asked Questions
How Long Can Mold Grow After Flooding Occurs?
Mold can start growing within 24 to 48 hours after flooding occurs. In the flooding aftermath, understanding the mold growth timeline is essential to preventing extensive damage and safeguarding your home and health.
Can I Use Bleach to Kill Mold?
While bleach can kill mold on non-porous surfaces, its effectiveness diminishes against mold growth on porous materials. You’re better off using specialized products designed for mold remediation to ensure complete removal and prevention.
What Are the Health Risks of Mold Exposure?
Mold exposure can lead to various health risks, including mold symptoms like coughing, sneezing, and skin irritation. You might also experience respiratory issues, especially if you have allergies or asthma, making prompt action essential for your well-being.
Will Insurance Cover Mold Damage From Flooding?
When flooding strikes, insurance policies often cover mold damage, but you’ll need to check your coverage limits. Understanding your policy can make the difference between financial relief and added stress during recovery.
How Can I Prevent Mold in My Basement?
To prevent mold in your basement, ensure proper ventilation and control moisture levels. Use dehumidifiers, seal any leaks, and consider adding exhaust fans to maintain airflow, keeping your space dry and inviting for everyone.
Review
Preventing mold after flooding isn’t just about cleanup; it’s an essential step toward protecting your home and health. By promptly removing water, drying affected areas, and choosing mold-resistant materials, you can greatly reduce mold risks. It’s surprising how quickly mold can take hold in damp environments—often when you least expect it. Regularly inspecting for signs of growth will keep you ahead of potential problems. Remember, timely action today can save you from costly repairs tomorrow.