When you face emergency water extraction, knowing the right steps can greatly reduce damage. Start by evaluating the source of the water and ensuring your safety. You’ll need specific equipment to tackle the situation effectively. Understanding how to contain and dry the affected areas is essential. There’s more to take into account, especially when it comes to preventing mold growth and documenting for insurance claims. Let’s explore the best practices that can guide you through this process efficiently.
Key Takeaways
- Quickly identify and contain the water source to prevent further damage and control the situation effectively.
- Equip yourself with protective gear, ensuring safety while assessing and addressing the water damage.
- Utilize appropriate extraction equipment, such as suction pumps and water vacuums, based on the severity of the water intrusion.
- Deploy dehumidifiers and air movers to enhance drying and reduce humidity levels in affected areas.
- Document the damage thoroughly with photos and notes to support insurance claims and track restoration progress.
How to Assess Your Water Damage: Initial Steps
When you discover water damage, the first step is to assess the extent of the problem.
Begin by identifying the water source whether it’s a burst pipe, roof leak, or flooding. Pinpointing the origin helps in understanding the scale of the damage.
Next, perform a detailed damage assessment; inspect walls, floors, and personal belongings for signs of structural weakening or mold growth.
Take note of any discoloration, warping, or musty odors, as these can indicate deeper issues.
Document your findings with photos and notes for insurance purposes.
Understanding the full scope of the damage allows you to plan effective next steps, ensuring you tackle the issue thoroughly and efficiently, fostering a sense of belonging in your community by addressing water-related emergencies responsibly.
Safety Precautions Before Water Extraction
After evaluating the extent of water damage, prioritizing safety is imperative before starting the extraction process.
Begin by developing an emergency plan that outlines steps to take in case of further complications. Equip yourself with appropriate protective gear, including gloves, goggles, and masks, to shield against contaminants and potential hazards.
Ascertain the affected area is well-ventilated to reduce exposure to mold spores and harmful chemicals. If electrical equipment is involved, cut off power to avoid electrocution.
Additionally, be mindful of structural integrity; check for sagging ceilings or unstable floors. By taking these precautions, you create a safer environment for yourself and others, fostering a sense of community and responsibility in the face of adversity.
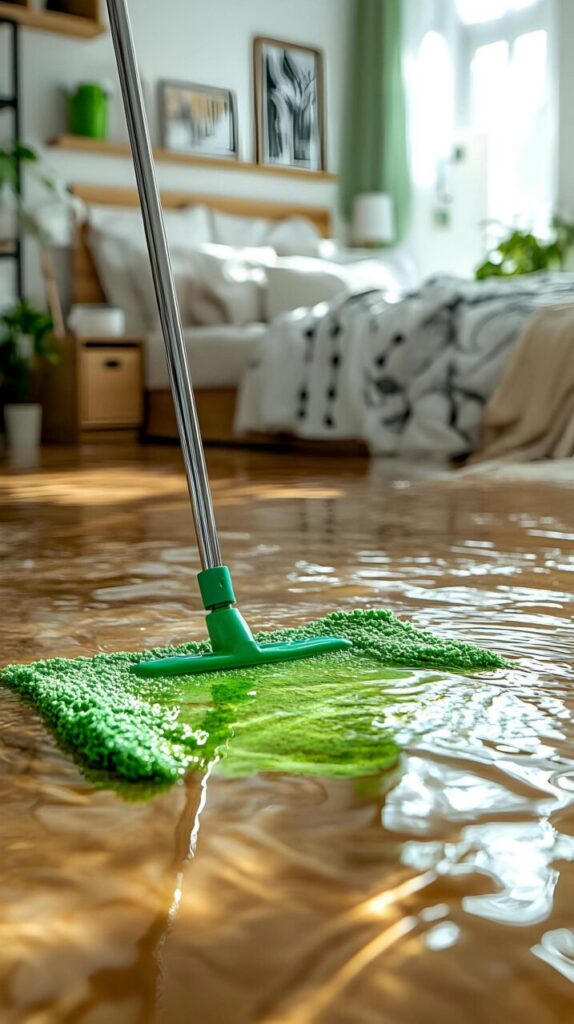
Gathering Essential Equipment for Water Removal
To effectively remove water from affected areas, you need to gather the right equipment before starting the extraction process.
Essential tools include suction pumps and water vacuums, which are specifically designed to handle large volumes of water efficiently. Suction pumps can remove water from deep areas, making them ideal for basements or flooded rooms. Water vacuums, on the other hand, are perfect for smaller spills and can easily navigate tight spaces.
Make sure to check the power and capacity of your equipment to guarantee peak performance. Having a reliable supply of hoses, extension cords, and additional filters will also enhance your efficiency.
Choosing the Best Water Removal Technique
Having the right equipment sets the stage for an effective water removal process, but choosing the best technique is equally important.
When faced with water damage, you’ll want to appraise various water extraction methods to determine which suits your situation best. For instance, submersible pumps are great for large volumes of water, while wet/dry vacuums work well for smaller areas.
Additionally, consider using dehumidifiers and air movers to accelerate drying. Effective techniques involve evaluating the severity and source of the water intrusion.
Always prioritize safety by wearing protective gear and ensuring electrical hazards are addressed. By selecting the right water removal technique, you’ll enhance the efficiency of your water extraction efforts and minimize further damage to your property.
How to Contain Water and Prevent Further Damage
To prevent further damage during a water emergency, you need to identify the source of the water quickly.
Once you’ve pinpointed the origin, use barriers effectively to contain the spread.
Don’t forget to turn off utilities to minimize risk and protect your property.
Identify Water Source Quickly
As you assess the situation, quickly identifying the source of water is crucial for containing the problem and preventing further damage.
Start by employing effective water detection methods. Look for visible signs like damp spots, discoloration, or mold growth. Use leak tracing techniques to pinpoint hidden leaks within walls or floors. This might involve utilizing specialized tools such as moisture meters or acoustic listening devices.
The sooner you locate the source, the better you can mitigate damage. Once identified, shut off the water supply if possible, and communicate the issue to relevant parties.
Use Barriers Effectively
Once you’ve identified the water source, your next step is to implement effective barriers to contain the water and prevent further damage.
Start by selecting appropriate barrier materials, such as sandbags, plastic sheeting, or absorbent pads. Each material has its strengths, so choose based on the specific situation. For instance, sandbags are excellent for redirecting water flow, while plastic sheeting can create a waterproof barrier.
Effective placement is essential. Position barriers at potential entry points and along the water’s path to minimize spread. Confirm barriers are tightly packed and sealed to avoid leaks.
Turn Off Utilities
Before you start any water extraction efforts, it’s crucial to turn off utilities to prevent further damage and guarantee safety.
Ensuring utility safety through proper disconnection reduces risks like electrical shock and gas leaks.
Follow these steps for effective utility disconnection:
Locate the Main Power Switch: Find the circuit breaker or fuse box and switch off the electricity to the affected area.
Shut Off Water Supply: Locate the main water valve and turn it off to prevent additional flooding.
Disconnect Gas Supply: If applicable, turn off the gas valve to avoid hazards during the extraction process.
Finding Hidden Water Sources in Your Home
To effectively locate hidden water sources in your home, start by inspecting common leak areas such as under sinks and around toilets.
Next, check behind appliances like refrigerators and washing machines, where moisture can accumulate unnoticed.
Finally, utilize moisture meters to accurately identify damp spots within walls or floors that may indicate leaks.
Inspect Common Leak Areas
Identifying hidden water sources in your home often starts with inspecting common leak areas that can go unnoticed.
Effective leak detection and moisture assessment help you prevent significant water damage.
Here are three critical areas to check:
Under sinks: Look for pooling water or dampness around pipes, as these can indicate leaks.
Around toilets: Inspect the base and the tank for signs of moisture, which may suggest a failing seal or a crack.
Walls and ceilings: Check for discoloration or bubbling paint, as these can signal hidden leaks behind drywall.
Check Behind Appliances
One often-overlooked area for potential water damage lies behind your appliances. It’s vital to check appliances like your refrigerator, dishwasher, and washing machine regularly.
These areas can harbor hidden moisture, which can lead to mold growth and structural damage over time. Start by carefully pulling out each appliance to inspect for leaks, condensation, or pooling water.
Pay attention to hose connections and drainage lines, as these are common culprits for water issues. If you notice any signs of moisture, address them immediately to prevent more extensive damage.
Utilize Moisture Meters
Moisture meters are essential tools for detecting hidden water sources in your home, providing accurate readings that help pinpoint areas at risk for water damage.
Proper moisture meter usage is vital for effective moisture level assessment. Here are three key steps to enhance your detection process:
Identify Potential Problem Areas: Focus on basements, crawl spaces, and around appliances where leaks are likely.
Conduct Regular Checks: Use the moisture meter periodically to monitor moisture levels, especially after heavy rainfall or flooding.
Interpret Readings: Understand the meter’s readings; a high level indicates potential issues, allowing you to take action before damage occurs.
How to Dry and Dehumidify After Water Extraction
Once you’ve completed the water extraction process, it’s crucial to initiate drying and dehumidifying as quickly as possible to prevent further damage.
Start by strategically placing dehumidifiers in areas most affected by moisture. Confirm they’re positioned to maximize airflow and effectiveness.
Use fans to enhance air circulation, directing air towards damp surfaces while keeping pathways clear. This combination of dehumidifier placement and air circulation accelerates evaporation, reducing humidity levels efficiently.
Monitor humidity levels regularly with a hygrometer to verify you’re on track. Aim for a relative humidity of 30-50% to create a conducive environment for drying.
How to Prevent Mold Growth After Water Damage
To prevent mold growth after water damage, you need to act quickly and efficiently.
Swift water removal is essential, along with proper ventilation techniques to promote air circulation.
Additionally, effective surface drying will help eliminate moisture that can lead to mold development.
Swift Water Removal
Swift water removal is essential in preventing mold growth after water damage, and acting within 24 to 48 hours can greatly reduce the risk.
Quick action during this emergency response phase is vital. Here are three key steps you should follow:
Assess the Situation: Evaluate the extent of the water damage and identify the source to prevent further issues.
Remove Standing Water: Use pumps or wet vacs to swiftly extract water from the affected areas.
Dry Affected Surfaces: Employ fans or dehumidifiers to guarantee all surfaces dry completely, inhibiting mold growth.
Proper Ventilation Techniques
After removing standing water and drying affected surfaces, maintaining proper ventilation is key to preventing mold growth.
You should focus on effective airflow management to promote rapid drying. Open windows and doors to create cross-ventilation, allowing fresh air to circulate. Using fans can enhance airflow, directing moisture-laden air outside while drawing in drier air.
Dehumidifiers are also essential tools for moisture control, as they extract excess humidity from the air. Monitor humidity levels with a hygrometer, aiming to keep them below 60%.
Effective Surface Drying
Effective surface drying is essential for preventing mold growth after water damage, and it requires a systematic approach.
To effectively dry surfaces, you should utilize these surface drying techniques:
Use moisture absorption materials: Implement materials like towels, sponges, or specialized absorbent pads to soak up excess water quickly.
Employ fans and dehumidifiers: Position fans strategically to promote airflow** and utilize dehumidifiers to reduce humidity levels, speeding up the drying process.
Monitor moisture levels: Regularly check surfaces with a moisture meter to confirm that they’ve reached safe dryness levels, preventing any potential mold growth.
Documenting Damage for Insurance Claims
Documenting damage accurately is crucial for securing your insurance claim after an emergency water extraction incident. Start your damage assessment immediately by taking clear, high-resolution photos of affected areas. Include wide shots and close-ups to capture the extent of the damage.
Make detailed notes describing the situation, including the date, time, and specific conditions that caused the water intrusion. Organize your insurance documentation meticulously, guaranteeing you maintain records of all communications with your insurance company. This can include emails, claim numbers, and any adjustments made.
If you’ve incurred additional costs for temporary repairs or living expenses, document those as well. Thorough documentation will support your claim and help guarantee you receive the compensation you deserve.
When to Hire Professionals for Water Extraction
Once you’ve assessed the damage and gathered documentation, it’s time to contemplate whether to hire professionals for water extraction.
In emergency situations, quick action is vital. Here are three indicators that professional services are necessary:
Extent of Water Damage: If the water damage is widespread or involves multiple rooms, it’s best to call in experts.
Mold Risk: If you notice mold growth or water has been standing for over 24 hours, professionals can address potential health risks.
Structural Concerns: If your home’s structure seems compromised, expert assessment and extraction are fundamental to guarantee safety.
Hiring professionals not only mitigates damage but also provides peace of mind during stressful times.
Frequently Asked Questions
Can I Use a Regular Vacuum for Water Extraction?
You can’t use a regular vacuum for water extraction. Instead, opt for a wet dry vacuum specifically designed for this purpose. A water vacuum effectively handles liquids, ensuring safety and efficiency during extraction.
How Long Does the Water Extraction Process Usually Take?
Think of water extraction like baking—timing matters. The water extraction duration varies based on factors like the amount of water, materials involved, and equipment used. Generally, expect it to take several hours to a few days.
What Should I Do if I Can’t Find the Water Source?
If you can’t find the water source, use water detection tools for leak identification. Check walls, ceilings, and floors for moisture. If necessary, consult professionals to help pinpoint the leak and prevent further damage.
Will My Homeowner’s Insurance Cover Water Damage Costs?
Your homeowner’s insurance might cover water damage costs, depending on the policy. For instance, if a burst pipe caused flooding, you could file a claim for repairs. Always check your specific insurance coverage details for clarity.
What Are the Signs of Structural Damage After Flooding?
After flooding, look for signs like cracked walls, warped floors, or sagging ceilings. Conducting a thorough damage assessment helps you identify structural issues early, ensuring your home remains safe and secure during the flood aftermath.
Summary
Following these best practices for emergency water extraction can greatly minimize damage and prevent long-term issues. For instance, a homeowner faced a flooded basement after heavy rains. By quickly evaluating the situation, using the right equipment, and implementing drying techniques, they successfully avoided mold growth and costly repairs. Remember, acting swiftly and thoroughly documenting the process not only protects your property but also strengthens your insurance claims. Stay prepared and proactive to safeguard your home.