Like a skilled surgeon evaluating a patient, you must carefully analyze the aftermath of a flood. Effective drying structures hinge on your ability to act swiftly and methodically. From water extraction to monitoring moisture levels, each step plays an essential role in preventing further damage. Understanding these strategies is fundamental to ensuring success, but are you aware of the hidden challenges that can arise during the process?
Key Takeaways
- Quickly extract water using pumps and wet vacuums to minimize damage and prevent mold growth.
- Ensure adequate airflow and ventilation by using fans and opening windows to promote drying.
- Utilize high-capacity dehumidifiers to effectively remove moisture from the air and structures.
- Monitor humidity levels with hygrometers, aiming for a target between 30-60% to deter mold.
- Regularly check hidden areas for moisture using moisture meters to ensure thorough drying.
How to Handle Water Damage Effectively
When you face water damage, acting swiftly is essential to mitigate its effects.
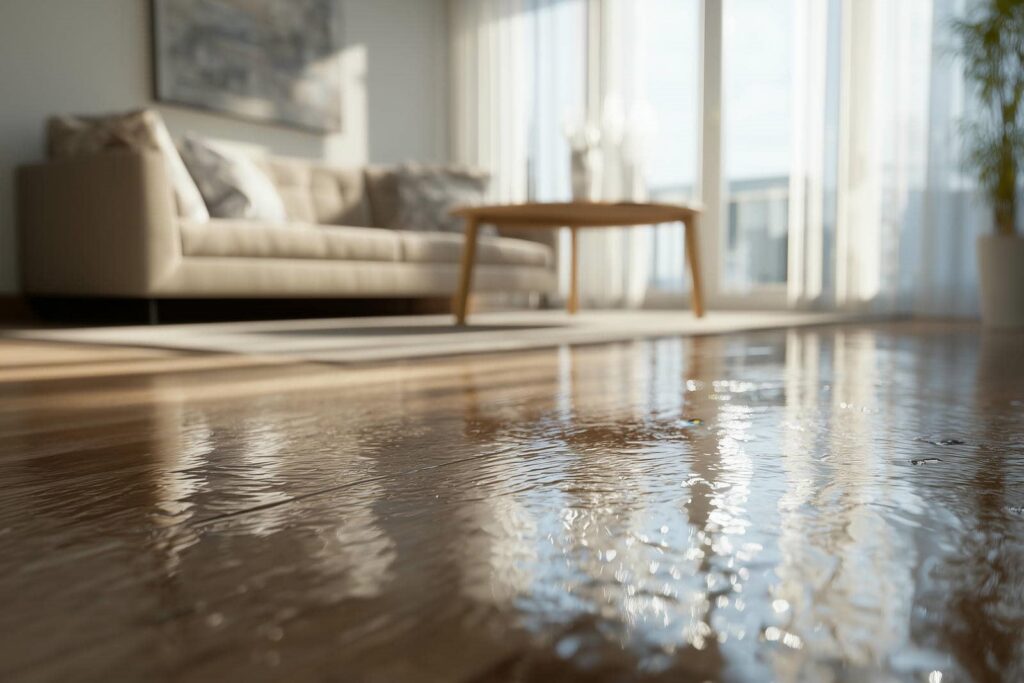
Begin with water extraction; removing standing water minimizes damage and accelerates the drying process. Utilize pumps and wet vacuums for effective removal, ensuring you tackle all affected areas.
Once the water’s gone, focus on mold prevention. Mold can develop within 24-48 hours, so employ dehumidifiers and fans to increase airflow and reduce moisture levels.
It’s vital to check hidden spaces, such as behind walls and under flooring, where water may linger. If you’re uncertain about the extent of damage, don’t hesitate to consult professionals.
Taking these methodical steps protects your property and fosters a sense of community as you tackle challenges together.
Assess the Extent of Water Damage
How can you accurately assess the extent of water damage to your property? Start by identifying the water source—was it from a natural flood, a burst pipe, or an appliance failure? Understanding this will guide your damage assessment.
Inspect your home methodically, checking walls, ceilings, and floors for discoloration, warping, or mold growth. Use moisture meters to measure dampness in affected materials, as this will help determine the severity.
Don’t forget hidden areas like crawl spaces or attics, where moisture can linger. Document your findings with photos and notes, as this will be invaluable for insurance claims.
Prioritize Safety Before Cleanup
Before you begin any cleanup efforts, it’s essential to prioritize safety to protect yourself and others from potential hazards.
Start by establishing safety protocols that will guide your actions throughout the process. Wear personal protective equipment (PPE) such as gloves, masks, and goggles to shield yourself from contaminants and debris.
Inspect the area for structural damage, exposed electrical wires, or hazardous materials that could pose risks. Confirm you have a reliable source of light to navigate safely, especially in dim conditions.
Communicate with others involved in the cleanup to maintain awareness of potential dangers.
Get Your Air Movers Working Fast
To effectively dry your structure, you must select the right air movers for your specific situation.
Positioning these devices strategically can greatly enhance airflow and moisture evaporation.
Choose Right Air Movers
Choosing the right air movers is essential for effective drying, especially when time is of the essence. Start by identifying air mover types that match your specific needs—high-velocity fans for quick drying or low-profile units for tight spaces.
Each type facilitates ideal airflow, vital for evaporating moisture efficiently. Consider factors like power, size, and energy consumption; these will impact both performance and cost-effectiveness.
Don’t overlook the importance of CFM (cubic feet per minute) ratings, as they indicate how much air the mover can circulate. Selecting the right combination not only accelerates the drying process but also fosters a sense of community support, as everyone benefits from a safe, dry environment.
Your choice of air movers can make a significant difference in recovery success.
Positioning For Maximum Efficiency
Effective positioning of air movers can dramatically enhance drying efficiency, especially when you’re racing against time.
Start by evaluating your space and adjusting furniture placement to create clear pathways for airflow direction. Position air movers at 45-degree angles, directing the airflow towards the wettest areas, while ensuring they don’t obstruct movement or access.
Utilize a combination of high-velocity and low-profile units to optimize airflow across various surfaces, including floors and walls.
Monitor the drying process closely; reposition air movers as necessary to adapt to changing conditions.
By methodically placing your equipment, you’ll maximize the effectiveness of your drying efforts, fostering a quicker return to normalcy for everyone involved.
Use High-Capacity Dehumidifiers for Effective Drying
While many strategies exist for drying structures, using high-capacity dehumidifiers stands out as one of the most efficient methods. These powerful machines excel in removing moisture from the air, greatly speeding up the drying process.
When selecting a dehumidifier type, consider the area’s size and the extent of water damage. High-capacity units can handle larger volumes, making them ideal for extensive flooding situations.
Pairing these dehumidifiers with effective drying techniques, like air circulation and ventilation, enhances overall results. By strategically placing high-capacity dehumidifiers, you’ll create a favorable environment for moisture removal, fostering a sense of community among those facing similar challenges.
You’re not alone in this; together, you can restore your space and reclaim comfort.
Use Thermal Imaging to Find Hidden Moisture
High-capacity dehumidifiers play a vital role in the drying process, but they can’t always detect moisture hidden behind walls or beneath floors.
To effectively locate this hidden moisture, you can rely on thermal imaging techniques, which provide a non-invasive solution.
Here’s how you can enhance your moisture detection strategy:
- Scan surfaces: Use thermal cameras to identify temperature differences that indicate moisture presence.
- Inspect boundaries: Focus on areas where materials meet, as they’re often prone to leaks.
- Monitor fluctuations: Regularly check readings to track changes over time, indicating moisture movement.
- Document findings: Record thermal images for analysis and to share with restoration teams.
Seal Affected Areas to Prevent Further Water Damage
To effectively seal affected areas and prevent further water damage, you first need to identify all impacted zones thoroughly.
Once you’ve pinpointed these locations, use appropriate sealants to create barriers that limit moisture intrusion.
Additionally, monitoring humidity levels in these areas ensures that your efforts remain effective over time.
Identify Affected Areas
Identifying affected areas in a structure is essential for effectively mitigating water damage, as unaddressed leaks can lead to severe deterioration over time.
A thorough flood assessment and damage identification process allows you to pinpoint where intervention is necessary. Here’s how to approach this task methodically:
- Inspect walls for discoloration or warping.
- Check ceilings for stains or sagging.
- Examine flooring for dampness or mold growth.
- Evaluate insulation in crawl spaces or attics.
Use Sealants Effectively
After pinpointing the areas affected by water damage, your next step is to seal these zones effectively to prevent further issues.
Start by selecting appropriate sealant types—liquid, paste, or foam—based on the surface and extent of damage. For porous materials, a penetrating sealant works best, while non-porous surfaces may require a surface sealant.
When applying, make sure the area is clean and dry, using application techniques like brushing or spraying for even coverage. Pay attention to edges and joints, as these are common leakage points.
Allow adequate drying time as per the manufacturer’s instructions to ensure maximum adhesion and effectiveness.
Monitor Humidity Levels
Keeping an eye on humidity levels is essential for maintaining a dry environment in your structure, especially after sealing affected areas.
Effective humidity control starts with consistent moisture monitoring. Here are four key strategies to implement:
- Use Hygrometers: Regularly check indoor humidity levels with reliable hygrometers.
- Set Target Levels: Aim for humidity levels between 30-60% to deter mold growth.
- Ventilate Properly: Ensure adequate airflow in sealed areas to promote drying.
- Adjust Climate Control: Utilize air conditioning or dehumidifiers to maintain ideal humidity.
How to Use Moisture Meters for Accurate Readings
Moisture meters are vital tools that provide precise readings, ensuring effective drying processes in structures.
To achieve ideal reading accuracy, start by performing moisture meter calibration according to the manufacturer’s guidelines. This step is essential, as an uncalibrated meter can give misleading data, hindering your drying efforts.
Next, select the appropriate mode for the material you’re testing, whether it’s wood, drywall, or concrete. When taking measurements, make sure the probe contacts the surface directly for the most reliable results.
Regularly check multiple areas to identify hidden moisture pockets. By consistently applying these methods, you enhance the accuracy of your readings and foster a sense of community with others facing similar challenges in effective flood recovery.
When to Call Professional Water Damage Restorers?
How can you determine when it’s time to bring in professional water damage restorers? Recognizing the right moment can greatly impact the efficiency of flood restoration. Here are four key indicators:
- Extensive Water Damage: If you’re dealing with considerable flooding that exceeds your ability to manage.
- Mold Growth: Any signs of mold within 24-48 hours post-flood should prompt immediate action.
- Structural Concerns: If you notice damage to walls, ceilings, or the foundation, it’s essential to consult experts.
- Health Risks: If contaminated water is involved, seek emergency services to ensure safety.
Frequently Asked Questions
How Long Does It Take for Structures to Fully Dry After a Flood?
It typically takes several days to weeks for structures to fully dry, depending on moisture levels and environmental conditions. Monitoring the drying timeline closely helps ensure effective drying, preventing mold growth and further damage.
What Types of Materials Are Most Vulnerable to Water Damage?
Wood, drywall, and insulation are most vulnerable to water damage, compromising structural integrity. In contrast, water-resistant materials like treated plywood and concrete can greatly mitigate risks, ensuring your spaces remain safe and durable post-flood.
Can I Start Repairs Before Everything Is Completely Dry?
You can’t start repairs before everything’s dry; that’d be too easy, right? Stick to the repair timeline. Use drying techniques to ensure a solid foundation, preventing future issues and fostering a safer, more secure environment.
What Should I Do With My Furniture After a Flood?
After a flood, assess your furniture for damage. Prioritize furniture restoration and consider professional upholstery cleaning to remove odors and stains. Dry everything thoroughly to prevent mold, ensuring your pieces remain part of your cherished space.
How Can I Prevent Mold Growth During the Drying Process?
Isn’t it frustrating when mold threatens your space? To prevent it, employ mold prevention techniques like dehumidifiers and fans, and utilize humidity control methods to maintain ideal moisture levels throughout the drying process.
Review
To effectively dry your structure post-flood, act swiftly, monitor diligently, and ventilate thoroughly. Extract water promptly, enhance airflow consistently, and use dehumidifiers strategically. Check for hidden moisture regularly and seal affected areas promptly. By prioritizing safety, utilizing the right tools, and knowing when to call in professionals, you can mitigate damage and prevent mold growth. Remember, the key to a successful recovery lies in your proactive approach and unwavering commitment to a dry, safe environment.