After water damage, the risk of mold growth escalates rapidly, often within just 24 to 48 hours. This growth not only threatens your health but can also lead to significant structural damage and expensive repairs. Understanding the urgency of mold prevention is vital for maintaining a safe living environment. What steps can you take to mitigate these risks effectively? Exploring the key measures might just save you from future complications.
Key Takeaways
- Preventing mold after water damage protects indoor air quality, reducing health risks associated with mold exposure such as allergies and respiratory issues.
- Swift intervention within 24 to 48 hours is crucial, as mold can begin to colonize quickly in damp environments.
- Addressing water damage promptly can save homeowners from costly repairs and extensive remediation efforts associated with mold growth.
- Using mold-resistant materials and implementing long-term strategies minimize the likelihood of future mold issues in high-risk areas.
- Regular inspections and maintenance of plumbing systems help prevent leaks and moisture accumulation, reducing mold risk significantly.
Why Mold Risk Increases After Water Damage
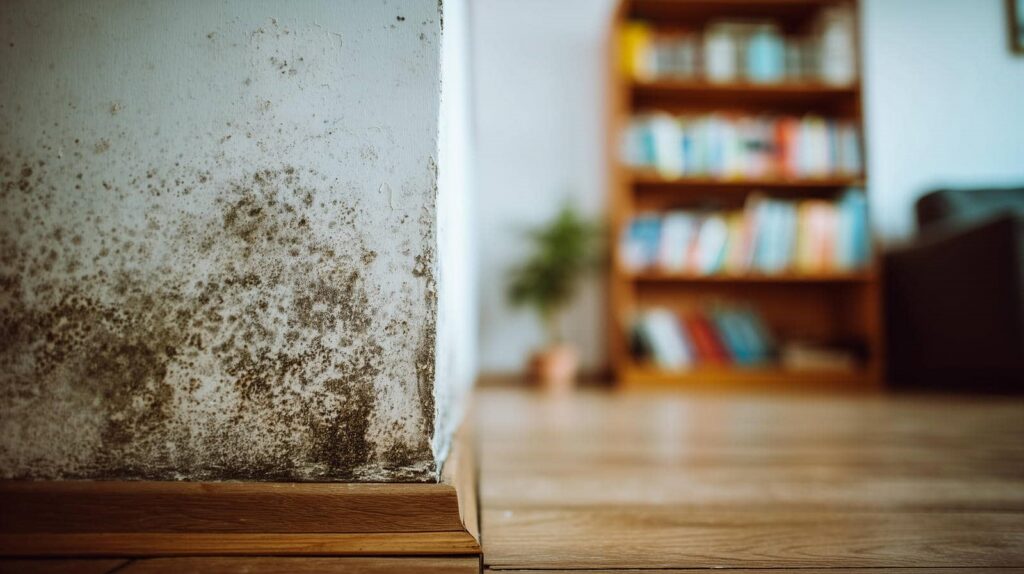
When water damage occurs, mold can thrive in the damp environment it creates, as moisture acts as a catalyst for fungal growth. You mightn’t realize that mold spores are everywhere, waiting for the right conditions to flourish.
After water damage, the combination of lingering moisture and organic materials—like wood or drywall—provides an ideal breeding ground for mold growth. To effectively combat this risk, moisture control becomes essential.
By promptly addressing leaks, drying out affected areas, and maintaining low humidity levels, you can greatly reduce the chances of mold taking hold.
How Quickly Should You Act to Prevent Mold Growth?
To effectively prevent mold growth, you should act within 24 to 48 hours after water damage occurs.
The mold growth timeline is essential; within just 48 hours, spores can begin to colonize, leading to potential health risks and structural damage. Consequently, your immediate response is critical.
Delay in addressing wet areas allows moisture to linger, creating an ideal environment for mold to thrive. By acting quickly, you protect your living space and foster a sense of community among those facing similar challenges.
Remember, swift intervention can make a significant difference, ensuring your home remains a safe and welcoming place for you and your loved ones.
Don’t underestimate the importance of your timely actions in preventing mold proliferation.
Key Steps to Effectively Dry and Dehumidify Water-Damaged Areas
To effectively dry and dehumidify water-damaged areas, you first need to assess the extent of the damage.
Understanding how much moisture is present allows you to target your efforts efficiently.
Once you have a clear picture, using dehumidifiers strategically can greatly reduce humidity levels and speed up the drying process.
Assess Water Damage Extent
Evaluating the extent of water damage is essential for effective remediation, as even a small leak can lead to significant problems if not addressed promptly.
Start by identifying the water source; this could be a burst pipe, roof leak, or flooding. Once you’ve located the source, conduct a thorough damage assessment to determine how far the water has spread.
Look for discoloration, peeling paint, or warping in materials. Don’t forget to check hidden areas, like behind walls or under carpets, where moisture can linger unnoticed.
This detailed evaluation will guide you in prioritizing the areas that require immediate attention, ensuring a more efficient drying and dehumidification process for your space.
Taking these steps fosters a safe, mold-free environment for everyone.
Use Dehumidifiers Effectively
After evaluating the extent of water damage, the next step involves utilizing dehumidifiers to effectively dry and dehumidify the affected areas.
Start by adjusting the dehumidifier settings to match the humidity levels in your space—aim for 30-60% relative humidity for ideal moisture control.
Place the dehumidifier in the center of the most affected area, ensuring air circulation isn’t blocked. Regularly empty the water collection tank or connect it to a drain for continuous operation.
Monitor the humidity levels using a hygrometer, adjusting settings as necessary.
Best Practices for Cleaning and Disinfecting Mold After Water Damage
After water damage, you need to assess the extent of the damage before proceeding with cleanup.
Using the right cleaning solutions is vital to effectively eliminate mold and prevent its return.
Finally, ensure a thorough drying process to eliminate moisture, as lingering dampness can foster additional mold growth.
Assess Water Damage Extent
When tackling mold prevention following water damage, evaluating the extent of that damage is crucial.
Start with a thorough water damage assessment to identify affected areas. Use moisture detection tools like moisture meters and thermal imaging cameras to uncover hidden dampness behind walls and under flooring. This step ensures you pinpoint problem spots before they escalate into larger issues.
Pay attention to materials that might retain moisture, such as drywall and carpets, as they’re prime candidates for mold growth. Document your findings to guide your remediation process and involve professionals if the damage is extensive.
Use Proper Cleaning Solutions
Proper cleaning solutions play an essential role in effectively combating mold after water damage. To create a safe environment, choose mold-resistant products specifically formulated to eliminate spores and prevent regrowth. Always follow the manufacturer’s instructions for application to ensure maximum efficacy.
Additionally, ensure proper ventilation during the cleaning process; this helps disperse airborne spores and reduces moisture, creating an inhospitable environment for mold. When using solutions, consider eco-friendly options that are less harsh on your indoor air quality.
Ensure Thorough Drying Process
To effectively prevent mold growth following water damage, ensuring a thorough drying process is essential.
You should employ advanced drying techniques, such as using dehumidifiers and fans, to enhance air circulation and facilitate moisture control.
Begin by removing any standing water promptly, then focus on porous materials like carpets and drywall, which can retain moisture.
Aim for a relative humidity level below 60% to inhibit mold growth.
Regularly check hidden areas, like behind walls and under floors, for dampness.
Remember, even a small amount of moisture can lead to significant mold issues.
By following these best practices, you’ll protect your space while fostering a healthier environment for everyone involved.
Your efforts truly matter in mold prevention.
DIY vs. Professional Mold Prevention: When to Choose Which
How do you decide between tackling mold prevention yourself and hiring professionals?
If your space has minimal water damage, DIY methods, like using vinegar or baking soda, can be effective. They’re budget-friendly and empower you to take control.
However, if you’re facing significant water damage or have health concerns, professional services are vital. Experts possess specialized equipment and knowledge to assess hidden mold risks. They ensure thorough remediation, minimizing the chance of recurrence.
Consider your comfort level, the extent of damage, and time constraints. Ultimately, choosing the right approach hinges on balancing cost, effectiveness, and the safety of your environment.
You want to create a healthy space, so weigh your options carefully and make the best choice for your situation.
How to Spot Mold Infestation Early
What signs should you look for to detect mold infestation early? First, be aware of visible growth, especially in damp areas like bathrooms or basements. Look for discoloration on walls, ceilings, or around windows.
Next, pay attention to mold symptoms such as a musty odor, which often indicates hidden mold. If you notice respiratory issues, allergy-like reactions, or skin irritations, these could signal mold exposure.
Early detection is vital for preventing extensive damage and health risks. Regularly inspect areas prone to moisture, like pipes, roofs, and appliances.
Maintaining a Mold-Free Environment After Restoration
After restoring a water-damaged area, it’s crucial to implement strategies that ensure a mold-free environment.
Start with preventive measures, such as controlling humidity levels below 60% and ensuring proper ventilation in areas prone to moisture, like bathrooms and kitchens. Regularly check for leaks and address any plumbing issues immediately.
Incorporating long-term strategies is essential for sustained success.
Use mold-resistant materials during restoration and apply mold inhibitors in high-risk areas. Establish a routine for inspecting and cleaning surfaces where mold could thrive, such as basements and crawl spaces.
Frequently Asked Questions
Can Mold Develop in Places Without Visible Water Damage?
Yes, mold can develop in places without visible water damage. Hidden moisture often exists behind walls or beneath floors, providing a breeding ground for mold spores to thrive, even when you can’t see any water damage.
What Types of Mold Are Most Common After Flooding?
After flooding, you’ll often encounter black mold, a notorious intruder in damp environments. During flood recovery, be vigilant; other common molds like Aspergillus and Penicillium can also thrive, turning your home into an unwelcome breeding ground.
How Does Humidity Affect Mold Growth Rates?
Humidity greatly affects mold growth rates; higher humidity accelerates mold development. By implementing effective humidity control, you enhance mold prevention efforts, creating a healthier environment and reducing the risk of potential health issues associated with mold exposure.
Can Mold Exposure Lead to Long-Term Health Issues?
Yes, mold exposure can lead to long-term health issues. You might experience mold symptoms like respiratory problems or allergies, which can exacerbate existing health conditions and diminish your overall quality of life if not addressed promptly.
Are There Specific Materials That Mold Prefers to Grow On?
You’d think mold loves metal, but it actually thrives on organic materials like wood, drywall, and fabric. These materials provide nutrients, making them prime targets for mold growth if moisture’s present. Keep them dry!
Summary
In the battle against mold, acting swiftly is your best weapon. By understanding the risks and taking decisive steps to dry and disinfect affected areas, you can protect your health and property. Whether you choose DIY methods or call in professionals, your proactive approach can make all the difference. Remember, preventing mold isn’t just about fixing a problem; it’s about fostering a safe, resilient living space for yourself and your community. Don’t wait—act now to secure your future.